In the age of AI, getting noticed for your skills is of paramount importance. This is a great step for those looking for opportunities in a cluttered market with hundreds of applicants. Hiring managers look for skills other than those on your resume. This is where having an online presence helps you stand out. This guide will help you do just that, with step-by-step instructions on how to add your resume to a website and use it as your online profile.
Your own Resume Website
In this blog, you will learn how to take a Google document (from Google Docs) stored on Google Drive and publish it on an AWS static site. You can then use it to promote your profile with a link to your resume. You will be learning how to use AWS Free Tier for this exercise. For this, we will create a storage container (S3), which will house an HTML document (code included). We shall then create a static website to display your resume online. All this is free of charge.
Requirements
For your own AWS account, you will need:
- An Email that you have access to
- A credit card for authentication from AWS
Yes, that’s it! It is that easy to have your own AWS account.
Step-by-Step Guide
Next, let’s have a look at the summary of the entire process we need to carry out. The image below depicts the entire process in a nutshell
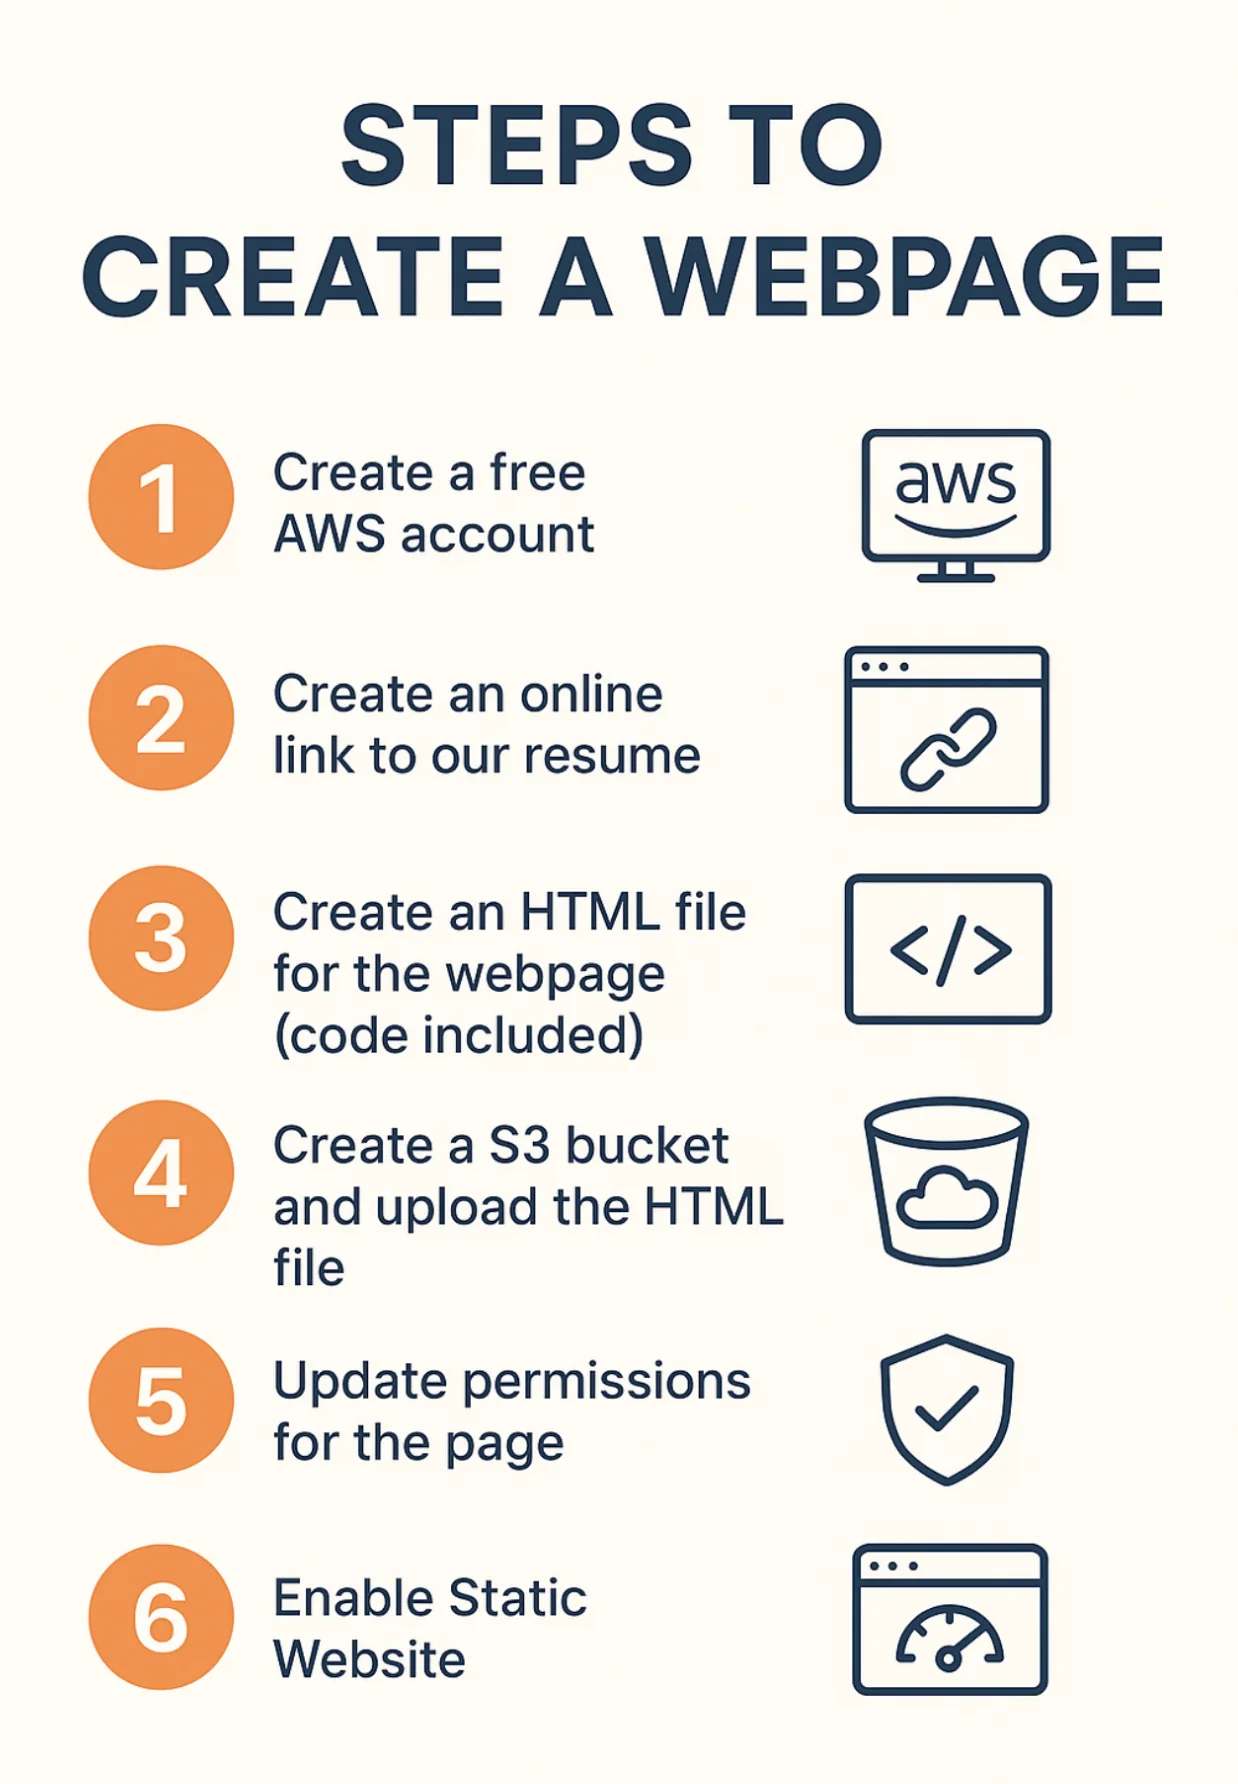
Now on to the steps that will help us achieve our desired outcome.
Step 1: Create an AWS account in the free tier
AWS Free tier allows up to 5 GB of Amazon S3 standard storage, 20,000 GET requests, 2,000 PUT/POST/COPY requests, and 15 GB of outbound transfer per month. Here, I will also tell you a way to keep your budget in check.
Next,
- Visit the AWS Free Tier account through the link here.
- Enter your email and account name, and verify your email address
- Pick your password (you might need to sign in again)
- Check Personal Account for your own projects (this provides you with free AWS services)
- Enter Billing information – since this is a free tier, no charges would be made except for an authentication check
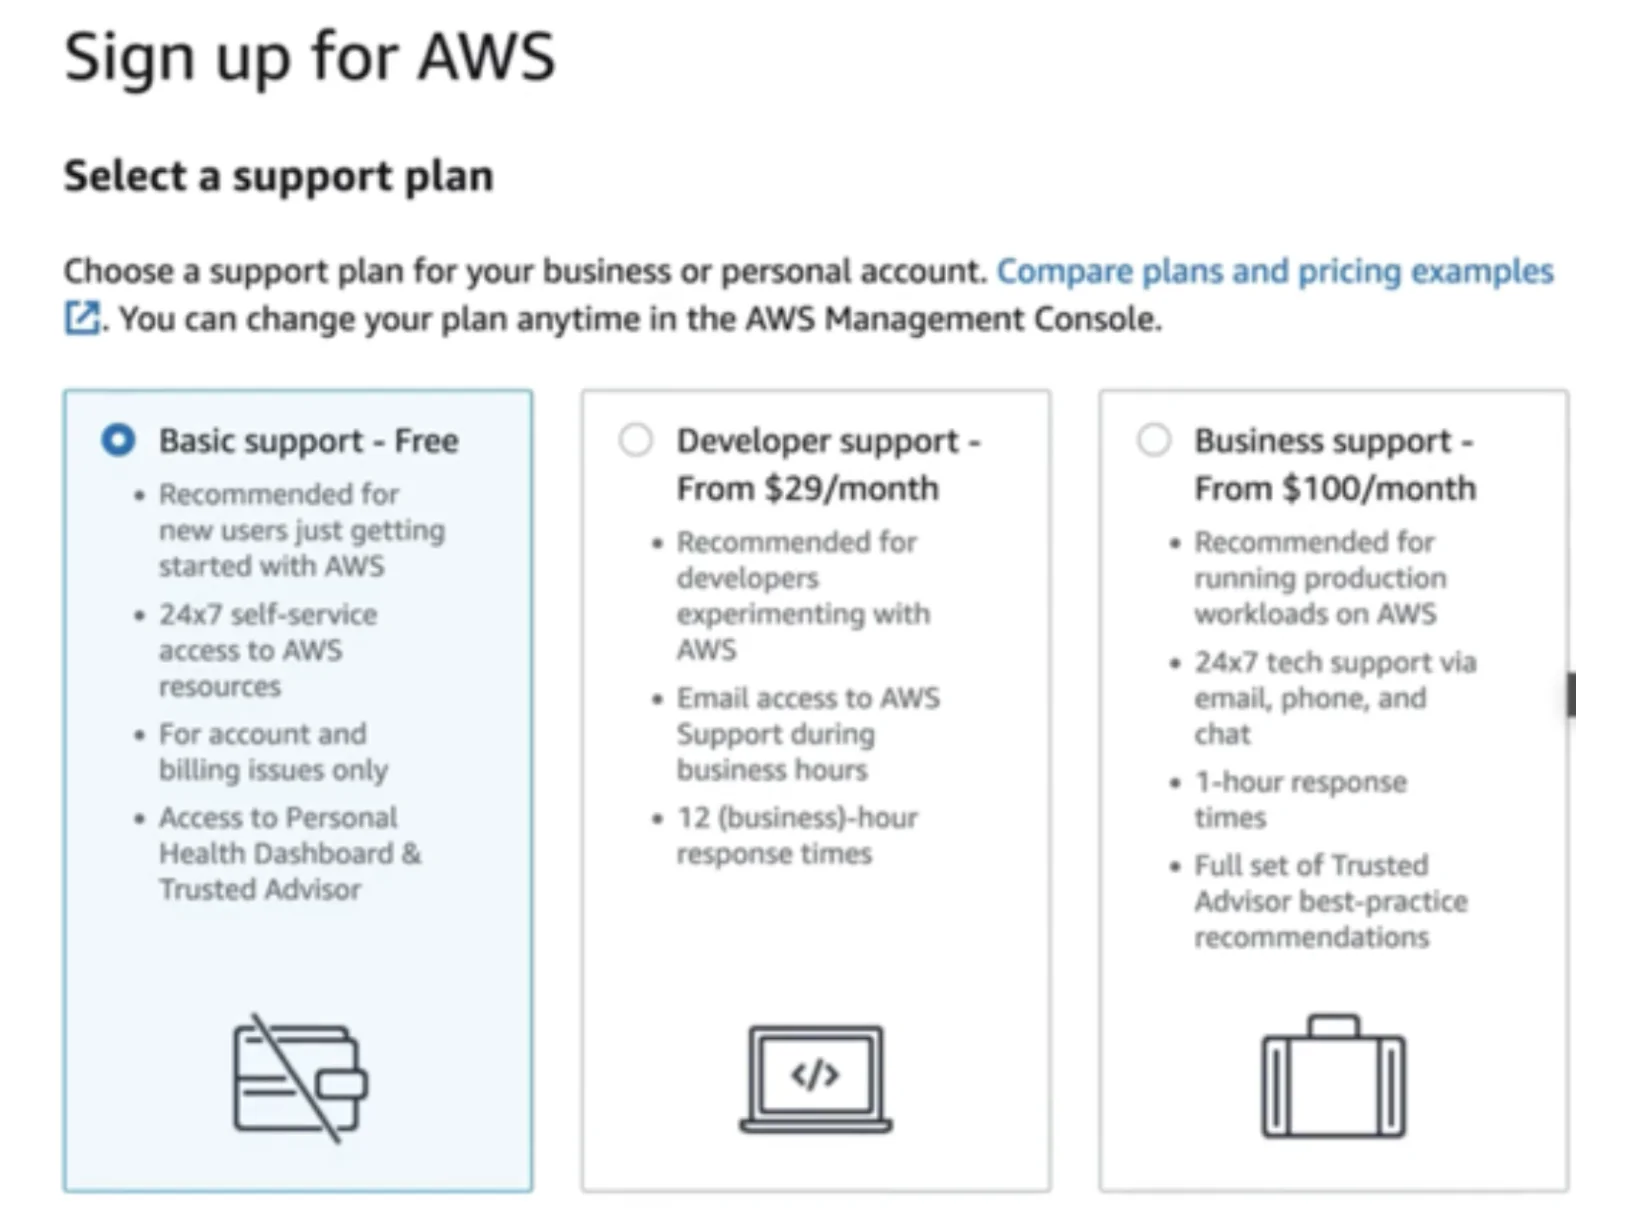
- Pick a basic support plan
Congratulations! You have created your first AWS Account.
Now, in the top right corner, click on your account name and go to billing and cost management. On this page, check your contact information and add alternate contact info if needed.
Step 2: Create a budget
This is to ensure you get any updates on the cost incurred. Don’t worry, this is just for being aware of what’s happening
- On the billing and cost management page, which we opened above, from the list on the left, click on billing preferences
- Check invoice delivery preferences and activate PDF delivery
- Also, check free tier usage alerts, as this will notify you of any usage thresholds on your account. Also, check the Cloud Watch billing alert
Now we will set up our budget, click on Budgets, and click on Create New Budget
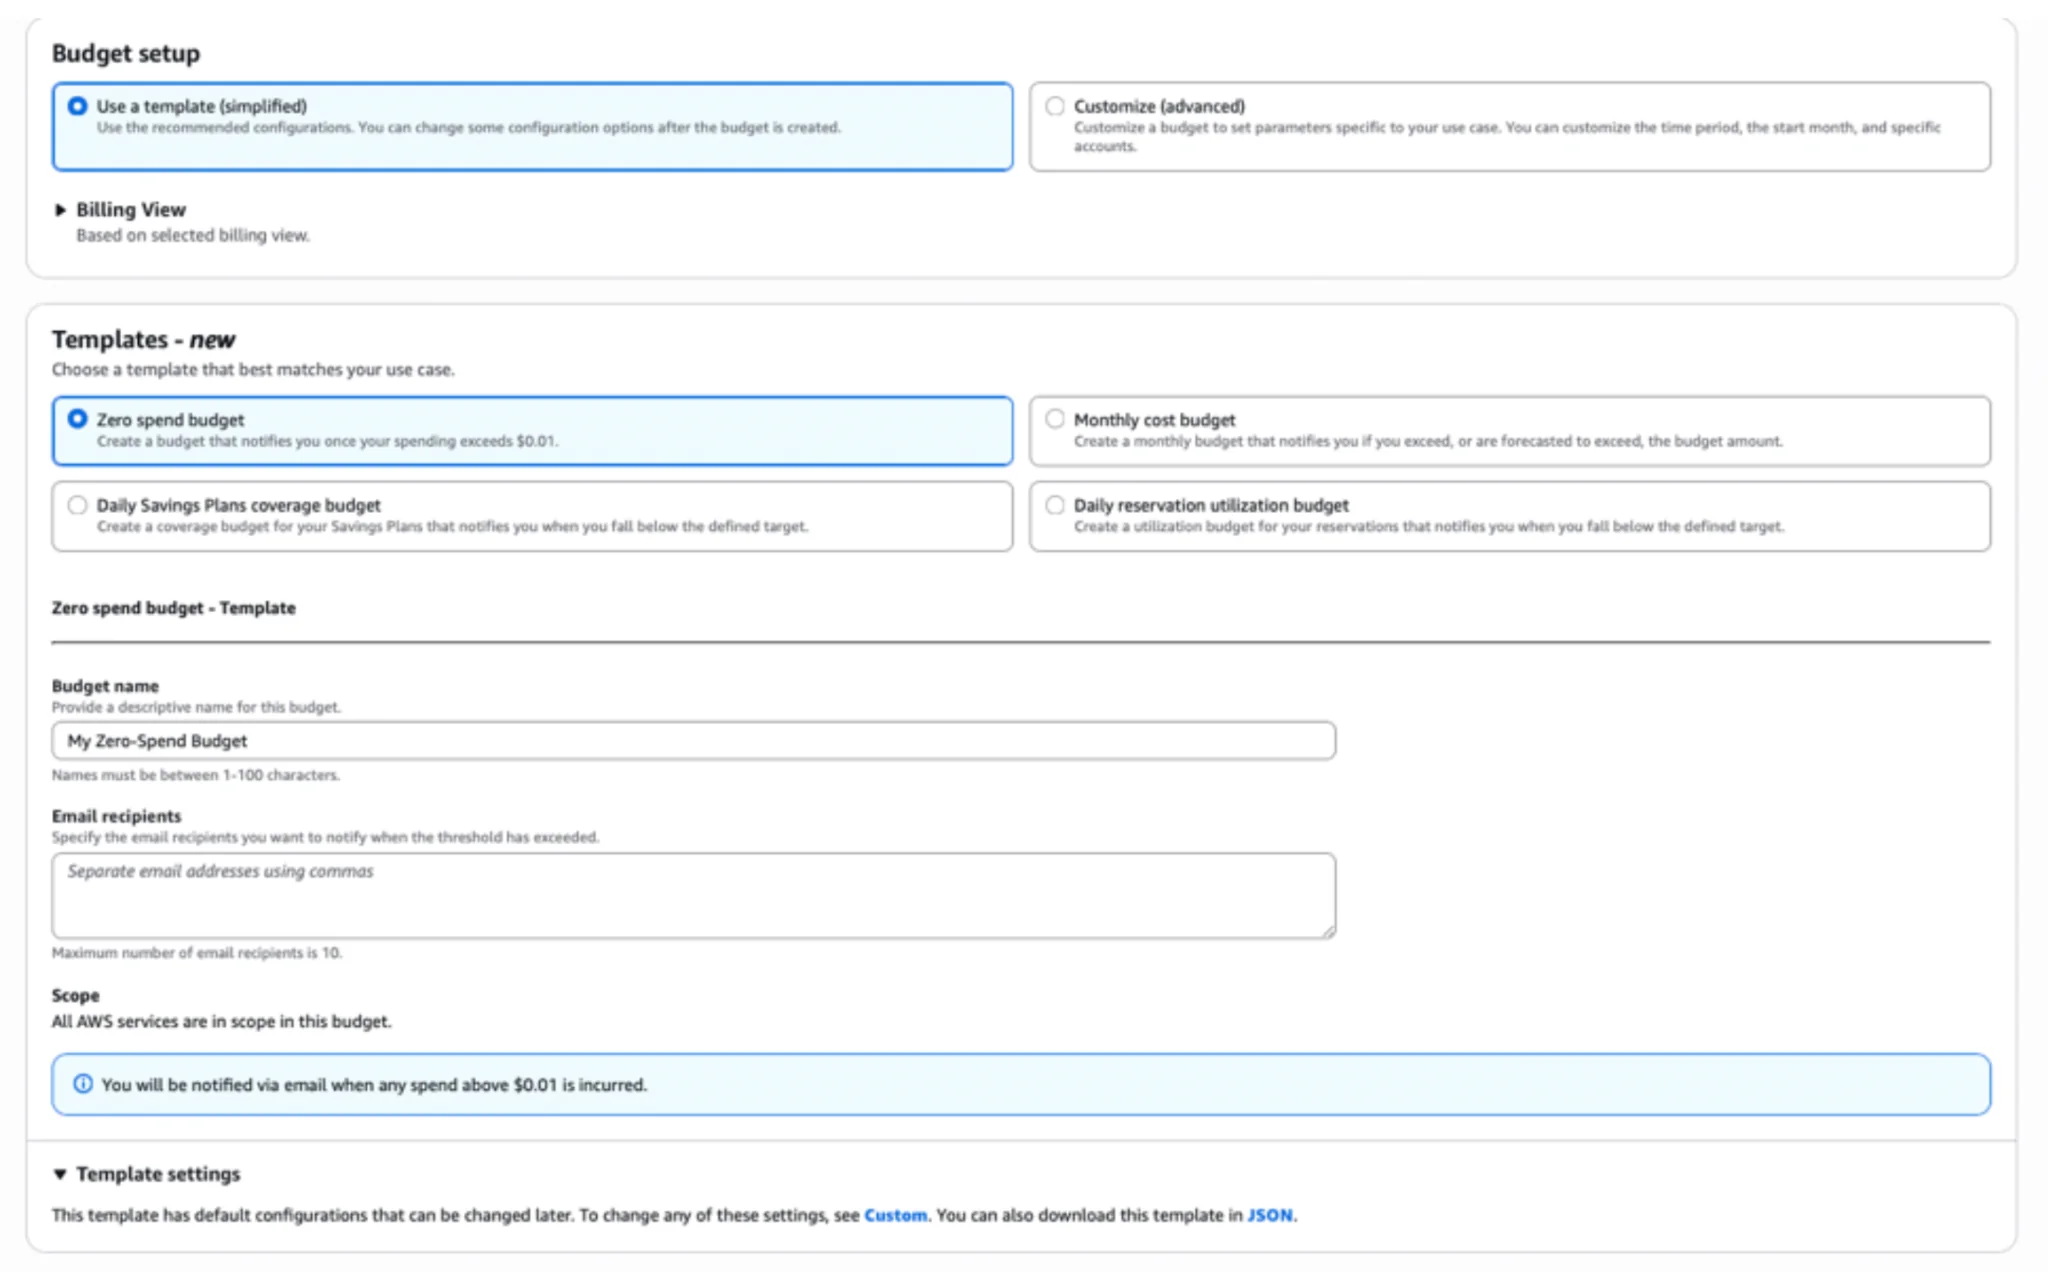
- In budget setup – select Use a template (simplified)
- In Templates – new – select Zero spend budget (You can select monthly as well if you wish to spend some amount)
- Add budget name – I entered My Zero Spend Budget
- Add your email to the email recipients
- Click Create Budget
That’s it, you have created your first budget in AWS.
Step 3: Resume & HTML document
Here we will accomplish two things: we will first get a link to our resume from Google Docs and then add this link to the HTML code for our website.
Don’t know HTML – don’t worry. I will provide the code wherever needed. You don’t really need to be an expert in HTML to do this.
- Upload your resume to Google Drive.
- Open Google Docs and locate the document you uploaded.
- Open the document on a browser and click on Share. In the share menu, click on the dropdown for General Access and select anyone with the link
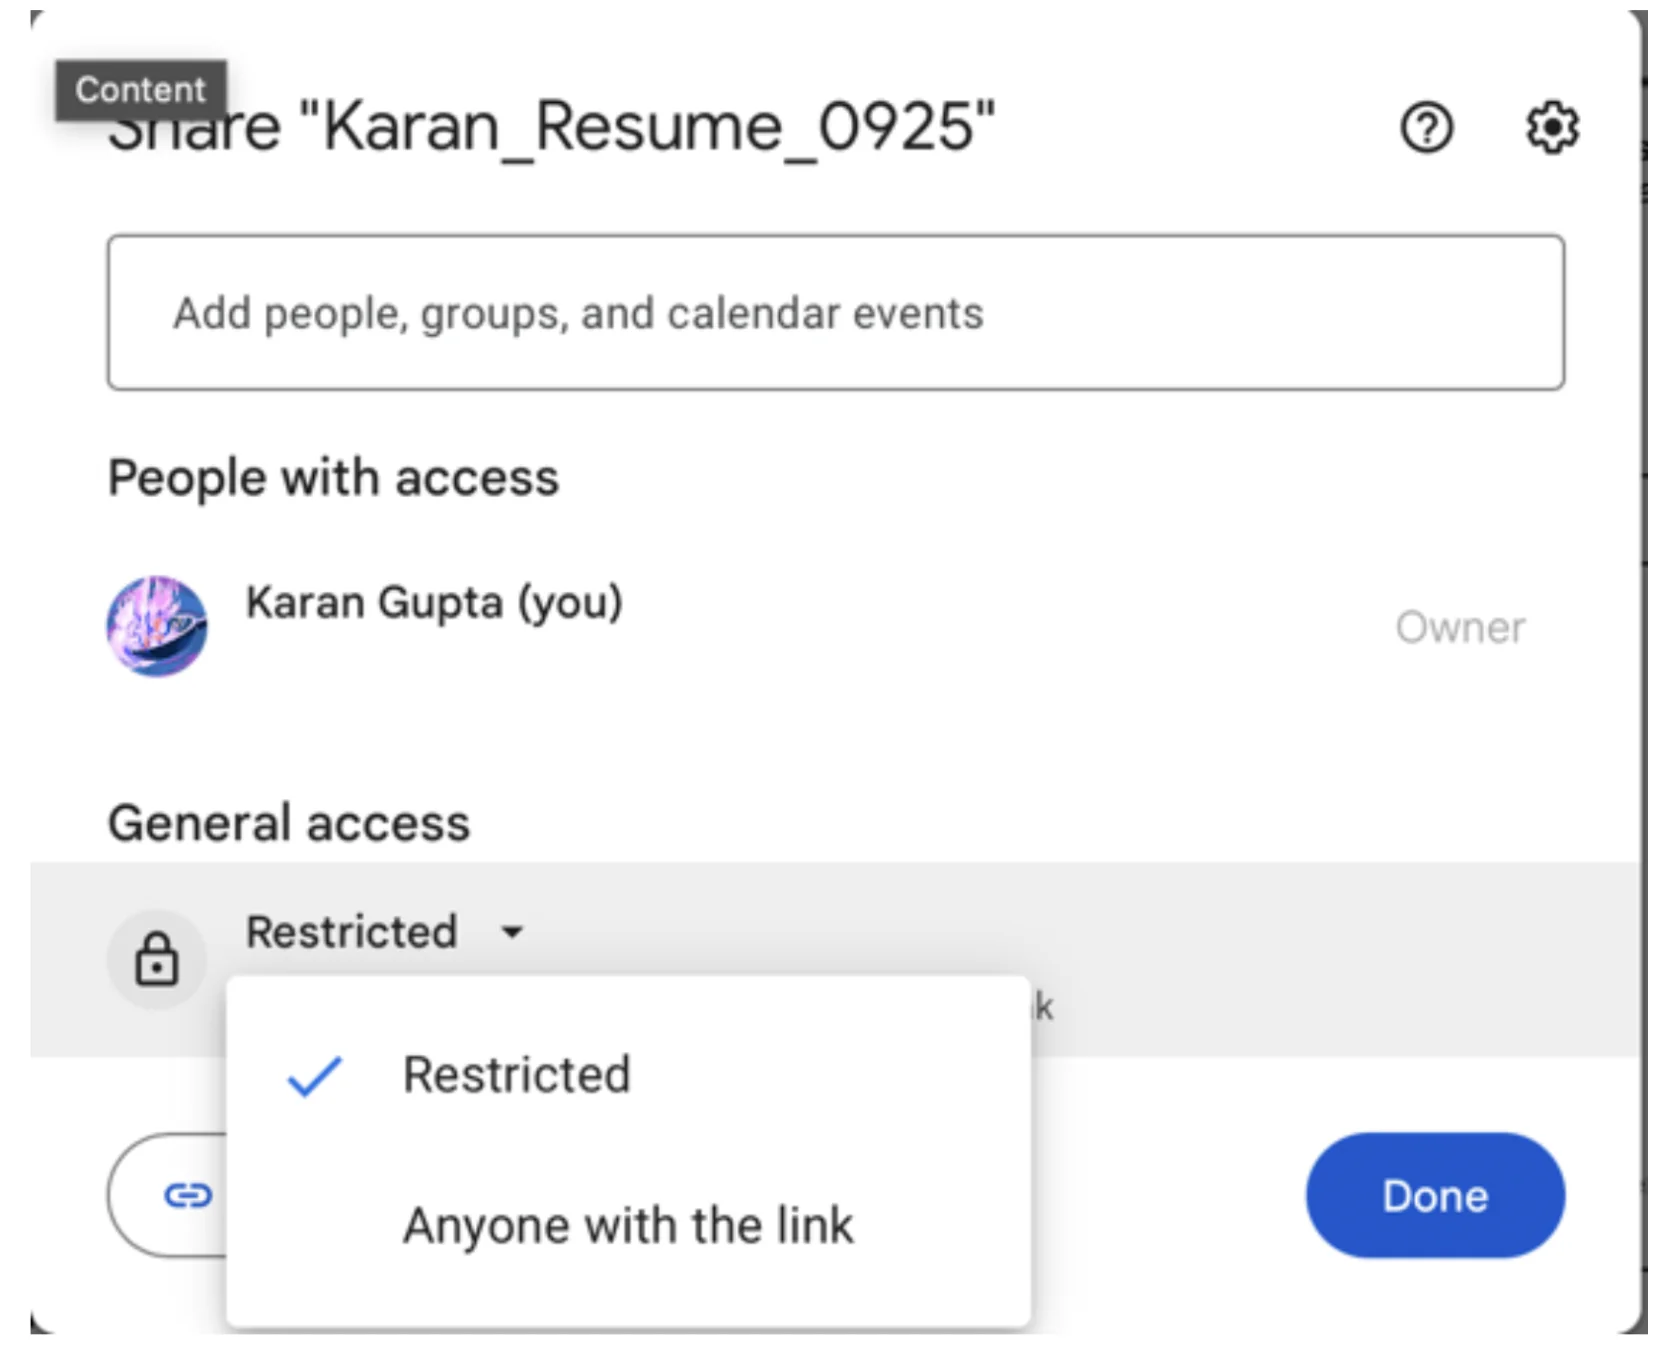
Copy this link and save it in Notepad. We are going to use it in the next step.
Next, we are going to build the index page, which is essentially the HTML page for our website. Take the code below & paste it into a text document and save it as .html
<!DOCTYPE html>
<html lang="en">
<head>
<meta charset="UTF-8" />
<meta name="viewport" content="width=device-width, initial-scale=1.0"/>
<title>Your Name - Resume</title>
<style>
/* Background image */
body {
margin: 0;
padding: 0;
font-family: 'Segoe UI', Tahoma, Geneva, Verdana, sans-serif;
background: url('https://images.unsplash.com/photo-1519389950473-47ba0277781c?auto=format&fit=crop&w=1950&q=80') no-repeat center center fixed;
background-size: cover;
height: 100vh;
display: flex;
justify-content: center;
align-items: center;
color: #fff;
}

.overlay {
background-color: rgba(0, 0, 0, 0.6);
padding: 40px;
border-radius: 10px;
text-align: center;
max-width: 500px;
width: 90%;
}

h1 {
margin-bottom: 20px;
font-size: 2em;
}

a.resume-button {
display: inline-block;
margin-top: 20px;
padding: 14px 28px;
font-size: 16px;
background-color: #1a73e8;
color: white;
text-decoration: none;
border-radius: 5px;
transition: background-color 0.3s ease;
}

a.resume-button:hover {
background-color: #155ab6;
}
</style>
</head>
<body>
<div class="overlay">
<h1>Hi! I am Karan. Click to see my resume</h1>
<p>Click below to view my resume:</p>
<a class="resume-button" href="https://drive.google.com/file/d/1lnfx64p5cBEGcIw3nnUQGTdUKRtF9OIH/view?usp=sharing" target="_blank" rel="noopener noreferrer">
View Resume on Google Docs
</a>
</div>
</body>
</html>
Change the link below at the end of the code with your name or anything else you want to display
Inside the double quotes, copy the link for your Google Doc resume that we saved earlier. Leave the rest as is and save as nameoffile.html
Step 4: Creating an S3 bucket with a static website
Now we will create an S3 bucket, which is a storage container inside AWS. We can store up to 5 GB of objects inside S3 in the free tier
Sign in to the AWS console
In the search tab, type S3 and click on S3

Create Bucket – keep it as a general-purpose
Name your bucket (Note: Bucket names must be 3 to 63 characters and unique. They must also begin and end with a letter or number. Valid characters are a-z, 0-9, periods (.), and hyphens (-))
Keep ACLs disabled

Uncheck the box to block public access, and check the acknowledgement
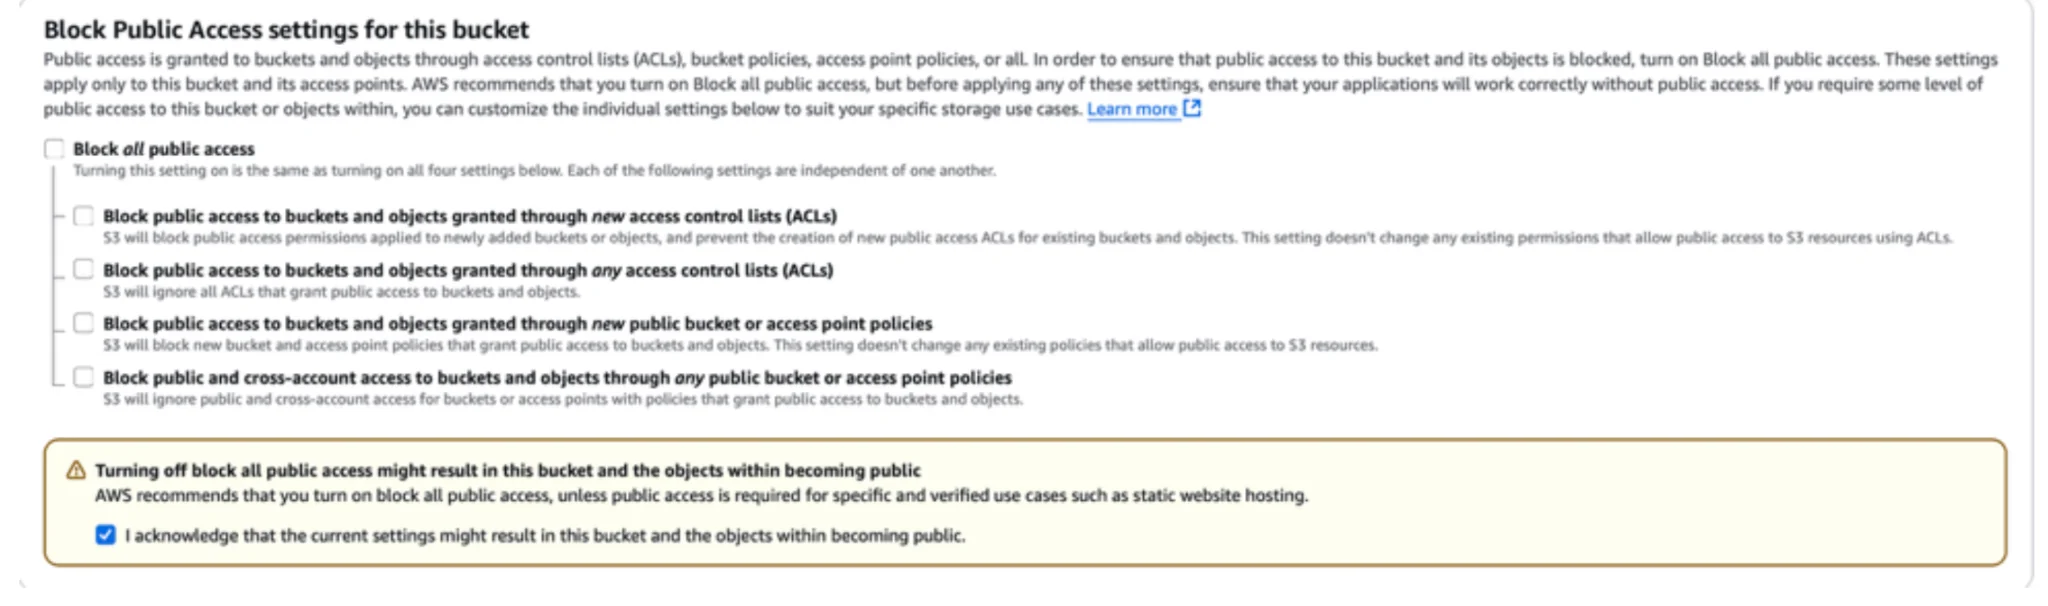
Leave the rest as is and click Create Bucket
You would see a success message at the top, as shown in the image here

Next, click on the bucket name, and then click on properties
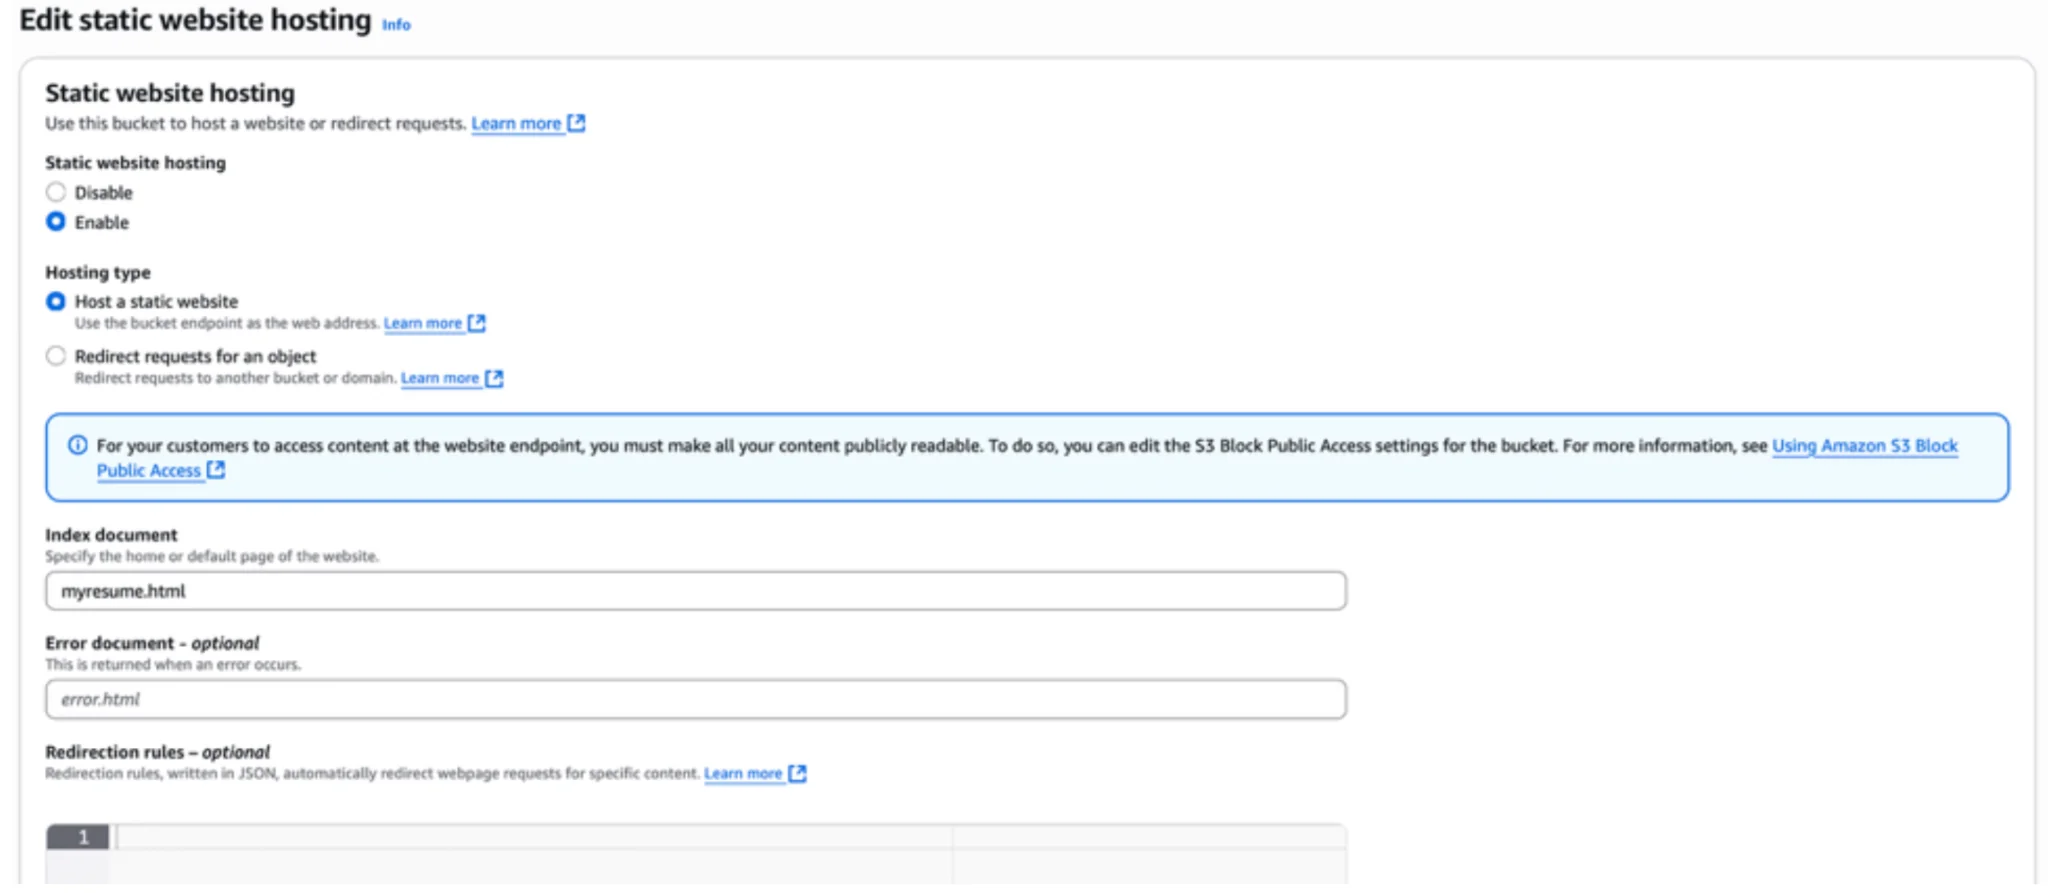
At the very bottom, you will see that static website hosting is disabled by default. Click on edit

Click Enable and paste the HTML file name in the index document box, and save
Now save the ARN (Amazon Resource Number) (mine is – arn:aws:s3:::karanresumeproject11234) and save it in a notepad – we are going to need it in the next step

Now go to the permissions tab and click on edit on bucket policy, and save the following code. Also copy the ARN above as in the example below
{
"Version": "2012-10-17",
"Statement": [
{
"Sid": "PublicReadGetObject",
"Effect": "Allow",
"Principal": "*",
"Action": "s3:GetObject",
"Resource": " arn:aws:s3:::karanresumeproject11234/*"
}
]
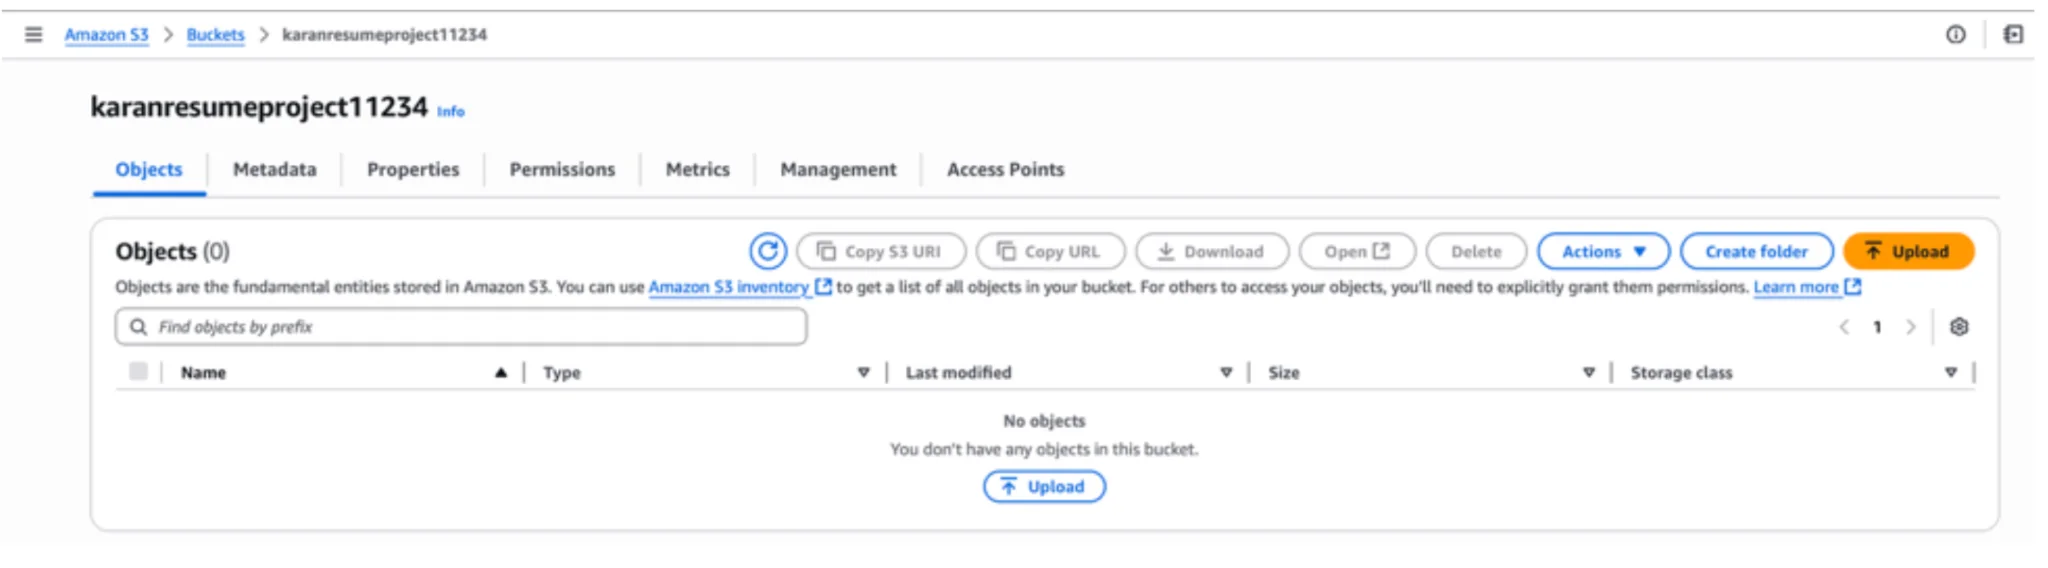
}Hit save, and now click on objects. In this step, we will upload the HTML file that we created as an object in this bucket
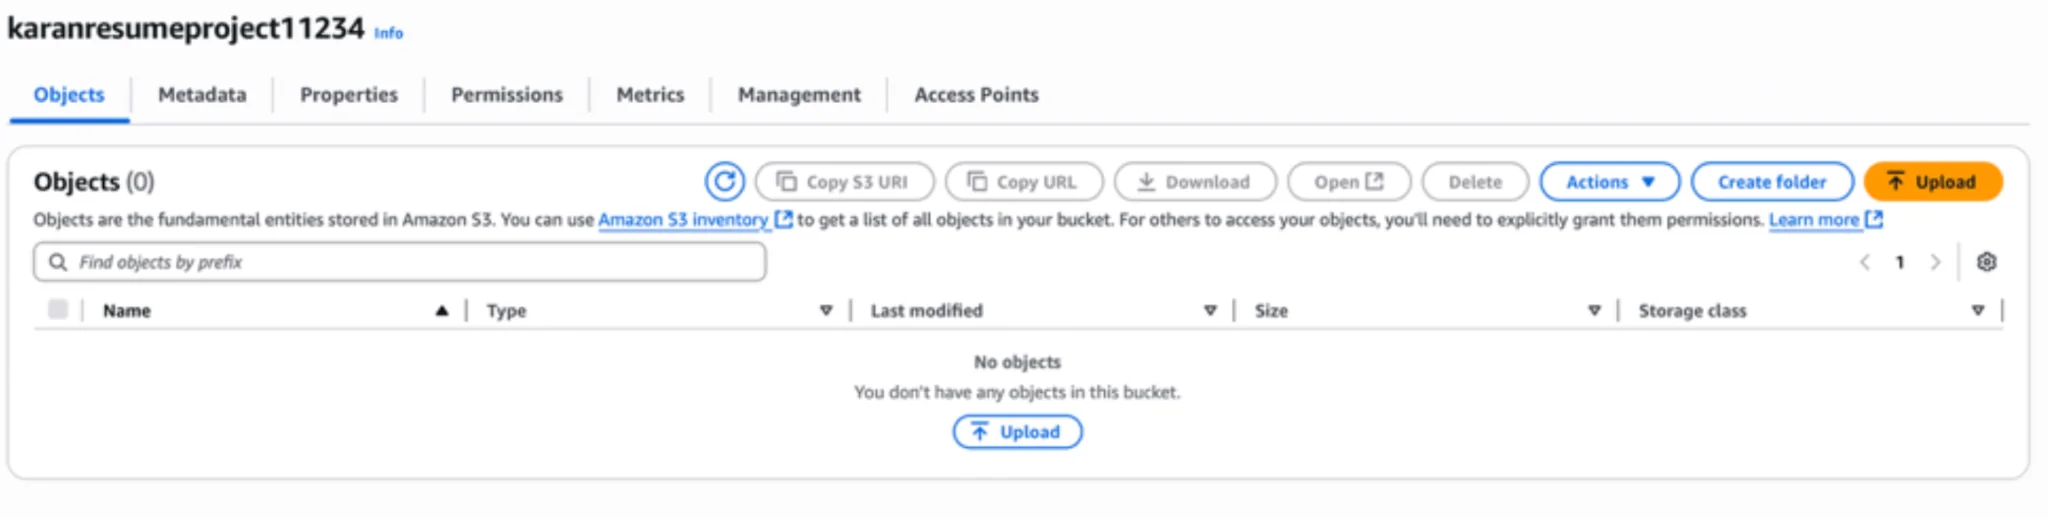
Inside objects, click on upload, add files, and add myresume.html file in step 3, and click upload. Hit close when you see the upload succeeded message.

That’s it, we are done.
Conclusion
Want to see the work that you just did. Go to Properties and scroll down to the very bottom, where it says static website hosting. There is a URL at the bottom. Click on it and there you go; you have just created your first website and hosted your resume online.
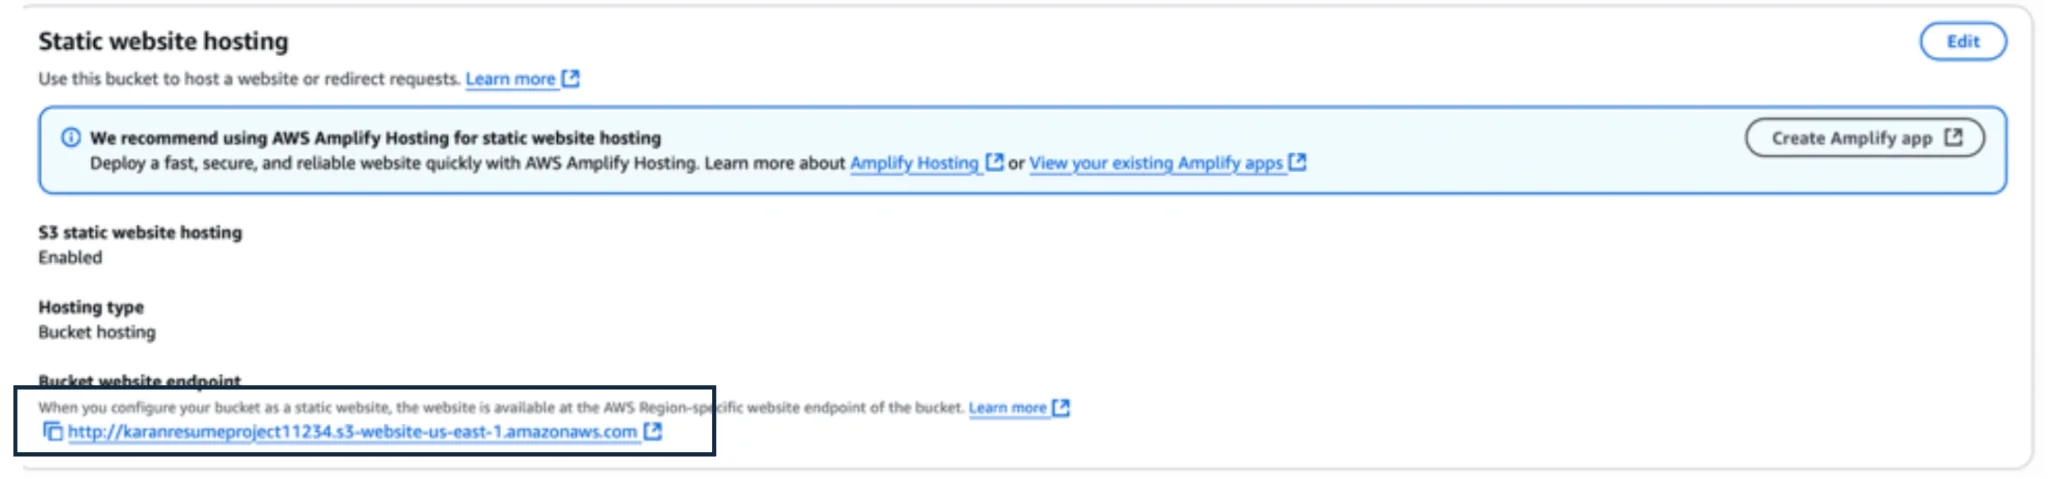
Simply click on the link and see if the resume you used shows up!!

In the AI age, getting yourself noticed is the key to a world of opportunities and goes a long way towards building a personal brand. This also propels us to do something we are not comfortable with and explore our boundaries.
This entire activity will help you on both fronts. It will help you stand out in a crowded job market by displaying your entire list of skills and professional experience. It will also showcase the extra efforts you went through to leave an impression. So, simply follow the steps above and have a distinctive mark for your next job role.
![]()
aran Gupta is a seasoned Data Engineer with over a decade of experience spanning consulting and asset management. With a strong foundation in building and optimizing data workflows, he specializes in tools and platforms such as Apache Airflow, AWS CodeBuild, AWS Athena, AWS CloudWatch, and PySpark. His expertise lies in designing scalable data pipelines and ensuring reliable data-driven solutions that empower business decision-making.
Karan’s professional philosophy is rooted in the belief that the best way to master a skill is through hands-on practice. This mindset has enabled him to consistently adapt to evolving technologies and deliver impactful results across diverse industries. Beyond his technical proficiency, he is passionate about knowledge-sharing and frequently engages with the wider data engineering community through blogs and thought leadership content.
Outside of work, Karan enjoys reading, writing, and keeping pace with emerging trends in data engineering and computer science. He is particularly enthusiastic about exploring how new tools and frameworks can enhance data processing and analytics in real-world applications.
Karan is also committed to helping aspiring professionals, offering career advice and interview preparation guidance. Connect with him on LinkedIn
Login to continue reading and enjoy expert-curated content.